
Most bathroom remodels take 2–6 weeks, depending on how big the space is and what you’re changing. A small bathroom might be done in 2–3 weeks, while a larger one could take 4–6 weeks or longer. If you’re doing the work yourself, expect it to take more time since contractors usually handle permits and inspections more quickly than DIY crews can manage.
Planning ahead makes a real difference. Finalize your design first, order materials early so they’re ready when work starts, and set aside about 15% extra in your budget for surprises. Hidden water damage, outdated plumbing behind walls, or structural issues pop up more often than you’d think, and you’ll want cash on hand to handle them without pausing the project.
The week-by-week breakdown gives you a clearer picture of what to expect. Your contractor or project timeline will show you exactly when demolition happens, when plumbing and electrical work takes place, and when finishing touches like tile and paint go in. Staying informed about each phase helps you plan around bathroom downtime and know when to schedule inspections with your local building department.
The Average Bathroom Remodel Timeline: What to Expect
Ever wondered why bathroom remodels seem to take forever? The timeline typically ranges from 2 to 6 weeks, though your project’s scope and complexity matter a lot. Small bathrooms usually wrap up in 2 to 3 weeks, while medium to large spaces need 4 to 6 weeks. Luxury remodels can stretch beyond 2 months.
The work follows a logical order: planning and design come first, followed by demolition, rough-in work, installation, and final touches. Demolition takes about 1 to 2 days—basically the crew removes old fixtures and surfaces. Rough-in work (running pipes and wiring behind walls) runs 3 to 5 days. Installation of new fixtures, flooring, and finishes spans 1 to 2 weeks, depending on what you’re adding.
Understanding these phase durations helps you prepare mentally and logistically. You’ll know roughly when to expect workers, when you won’t have water access, and when you can finally use your bathroom again. It’s easier to plan your life around a remodel when you know what’s coming next.
Small Bathrooms vs. Large Bathrooms: How Size Affects Duration
 1")
If you’re remodeling a tiny powder room, you’re looking at a quick 2–3 week sprint, but bump up to a master bath and you’ll need to block off 4–6 weeks instead. The reason’s pretty straightforward: bigger spaces mean more square footage to demo, more plumbing and electrical work to reroute, and way more tile or flooring to install. Your bathroom’s actual size basically sets the pace for everything else that happens during the project.
Think about it this way. A powder room might have one small wall of tile and minimal plumbing to adjust. A master bath? That could mean removing a bathtub, repositioning drain lines, rerouting electrical for heated towel racks or ventilation fans, and covering walls and floors with hundreds of square feet of material. Each of those tasks takes time, and they often happen one after another rather than all at once.
Space Constraints And Complexity
How much space you’re working with really does matter for your timeline. Small bathrooms move fast but need careful planning, while larger ones take longer because there’s more to reconfigure. Your layout and what you’re changing will affect how many weeks you’re looking at.
| Bathroom Size | Timeline | What Makes It Take Longer |
|---|---|---|
| Under 50 sq ft | 2-3 weeks | Simple layouts, basic fixture work |
| 50-100 sq ft | 4-6 weeks | More tile work, moving fixtures around |
| Over 100 sq ft | 5-7+ weeks | Moving walls, adding new plumbing, custom features |
In a tight space, contractors have to move slower and more deliberately. They can’t just swing a sledgehammer freely, and they need to protect existing areas. A 40-square-foot bathroom with new tile can feel like the crew is working in slow motion, but that’s because they’re being smart about it.
Larger bathrooms bring different challenges. If you’re moving a toilet, shower, or sink to a new spot, that means rerouting pipes and electrical lines. Those changes can add two to three weeks by themselves. Adding extras like heated tile floors or custom shelving bumps things up further since contractors have to order materials and fit them into the schedule.
Knowing your actual measurements and what you want to change lets you plan for realistic timing. It also helps you figure out whether you can live with construction happening around you or if you need alternative bathroom arrangements for your family.
Timeline Variations By Square Footage
The size of your bathroom really matters when you’re figuring out timing. Small bathrooms under 50 square feet can wrap up in 2-4 weeks if you’re just doing simple updates like new fixtures or paint. Medium bathrooms between 50-100 square feet typically need 3-8 weeks because you’re dealing with standard installations and might need to shift things around a bit. Large bathrooms over 100 square feet usually take 5-7 weeks, though major layout changes can push that to 9+ weeks.
Why does square footage affect your timeline so much. Bigger spaces mean more plumbing lines to run, more electrical work to handle, and more framing to sort out during demolition and rough-in phases. A 40-square-foot powder room doesn’t require nearly as much rerouting as a 120-square-foot primary bath. That’s just the reality of the work involved.
Knowing your bathroom’s square footage upfront helps you set expectations that actually match what’s coming. You won’t be caught off guard by unexpected delays, and you can plan around the actual time your contractor needs to do the job right.
DIY vs. Professional Remodels: Timeline Comparison
 2")
When you’re picking between doing a bathroom remodel yourself or hiring professionals, you’re basically trading time for money. DIY projects look cheaper at first, but a small bathroom usually takes 2–3 weeks, while a full remodel runs 4–6 weeks. A contractor handles the same work in 1–2 weeks for a small bathroom or 3–4 weeks for a full remodel.
Your experience level changes everything. If you’ve never installed tile or done plumbing work, expect learning curves and mistakes that stretch those timelines. You might need to redo sections, which adds days or weeks you didn’t plan for. Professionals move faster because they’ve done this hundreds of times and know exactly what comes next.
The real difference is in the details professionals handle. Contractors coordinate different trades—plumbers, electricians, tile setters—so everyone knows when to show up and what to work on. They also pull permits and handle inspections, so miscommunication doesn’t derail your schedule. You pay more for this coordination, but your bathroom actually gets finished on time instead of sitting half-done for months while you figure out your next step.
Professional Expertise And Speed
Ever notice how a bathroom remodel takes pros just a week or two while DIY projects stretch on for a month? The difference comes down to how work gets organized. Professional teams schedule trades like plumbers, electricians, and tile installers to work together at the same time, not one after another. They’ve already handled permits and figured out where to buy materials, so nothing gets stuck waiting.
| Project Type | Timeline | Key Advantage |
|---|---|---|
| Professional Small | 1–2 weeks | Expert scheduling |
| DIY Small | 2–3 weeks | Self-paced work |
| Professional Full-Scale | 3–4 weeks | Trade coordination |
| DIY Full-Scale | 4–6 weeks | Material lead times |
The real speed boost comes from experience. Pros know how to stop one problem from creating a pile of other problems. If a plumber finishes early, they’ve already planned what the electrician does next. When you work alone, you’re figuring this out as you go—which means waiting around while you order that special tile or figure out where the water line should go.
Professional teams work within a system built for getting things done on time. That’s not magic or some hidden trick. It’s just what happens when people do the same job over and over and learn the best way to do it.
DIY Skill Requirements And Risks
How much do you actually know about running water lines or mixing grout to the right consistency? Plumbing, electrical, and tiling work can stretch your timeline from 3–4 weeks down to 4–6 weeks, mainly because you’re learning while you work.
Add permits into the mix and things slow down more. You’ll handle the paperwork yourself, which eats up time. Material delays hit harder when you’re solo too, and one missed deadline tends to push everything else back.
The bigger concern is money. A plumbing mistake means cutting into walls. That kind of error can derail your whole project. Electrical work done wrong creates safety problems. Tiling errors waste materials and require do-overs.
If you have solid experience with these trades, go ahead. But if you’re new to them, it makes sense to hire professionals for the technical work and handle simpler tasks yourself. You’ll finish sooner, spend less fixing mistakes, and actually enjoy the process more.
Cost Versus Timeline Trade-offs
Cost Versus Timeline Trade-offs
Doing bathroom work yourself saves money, but it costs you time. When you hire professionals, you’re paying for their speed and their ability to coordinate. They have teams that work together, materials ordered before anyone swings a hammer, and permits handled before demolition starts. You’ll be juggling multiple contractors, waiting for deliveries, and figuring out inspections on your own.
| Project Type | DIY Timeline | Professional Timeline |
|---|---|---|
| Small Remodel | 2–3 weeks | 1–2 weeks |
| Full-Scale Remodel | 4–6 weeks | 3–4 weeks |
| High-End Custom | 6–10+ weeks | Faster with coordination |
The size of your project matters a lot. Simple updates like replacing fixtures or repainting take about 1–2 weeks either way. But if you’re changing where pipes and drains go, professionals finish faster because they’re working on your bathroom full-time instead of squeezing it in around their day jobs. Add permits and waiting for materials that are backordered, and you’re looking at an extra 1–3 days minimum. Basically, you’re trading money for time.
How Project Scope Changes Your Timeline
The scope of your bathroom remodel—what you’re actually changing—is the biggest factor that’ll determine how long the whole project takes. A simple cosmetic update runs 1–2 weeks, mid-range remodels with layout shifts need 4–6 weeks, and high-end custom work stretches to 6–10 weeks or longer.
Bigger scopes bring more complications. You’ll navigate more permits, inspections, and specialized labor requirements. These compliance steps add real time to your timeline. Mid-way scope changes are particularly tough because they trigger rework, material reorders, and additional inspections that snowball your costs and delays.
This is why building a 15% buffer matters increasingly as your scope expands. You’re protecting yourself from surprises that larger projects inevitably bring. Think of it as smart planning rather than overthinking.
Week 1 Timeline: Demolition, Rough-In, and Inspections
 3")
Your first week starts with a clean slate. Before any work begins, crews set up site protection—tarps, plastic sheeting, and dust barriers so your whole house doesn’t end up looking like a construction zone. Demolition typically takes a full day. Workers remove old fixtures, vanities, and whatever else is coming out, leaving you with bare walls and studs.
Next comes the rough-in phase, which runs about 2–3 days. This is when plumbers run new water lines through your walls, electricians thread wiring everywhere, and framers add or adjust studs. You’ll see the skeleton of your bathroom take shape. Walls get opened up, pipes snake through the framing, and outlets get roughed in before drywall goes up. It’s messy and loud, but this phase determines how everything else fits together.
Inspectors then review the plumbing, electrical, and structural work to confirm everything meets local building codes. In Portland, you can use FIR permitting to speed up this approval process rather than waiting for a standard inspection timeline. Once inspectors sign off, you’re clear to move forward.
Week 2 of Your Remodel: Drywall and Shower Prep
 4")
Week 2 is where your bathroom actually starts looking like a room instead of a construction site. The drywall gets addressed—crews remove sections that got affected by the plumbing and electrical work from Week 1, then patch and seal everything so it’s ready for the next steps.
Your shower pan installation happens now too, and this part gets real attention. Contractors lay down water barriers first, which are basically protective layers that keep water from seeping into the walls behind your shower. Then they install the actual pan and fill it with water to test the drainage. If it drains properly and doesn’t leak, you’re golden. Sometimes a site inspector will stop by to verify the work, which is honestly a good thing because it catches problems early.
The water barriers are typically made from materials like chlorinated polyethylene (CPE) or polyvinyl chloride (PVC), usually running between $50 and $150 depending on the shower size and material quality. These aren’t glamorous, but they’re the difference between a shower that works fine for years and one that causes wall damage down the road.
One thing worth noting: the testing phase matters. Some contractors skip the water test or do it quickly, but spending an extra hour to watch how water moves across your pan tells you whether installation was done right. It’s the kind of detail that feels small in Week 2 but pays off later.
Drywall Removal and Repair
Why does your contractor need to tear into your walls during Week 2? Your plumbing and electrical changes require access behind the drywall. They’ll remove sections strategically, then repair them once the rough-in work finishes.
Drywall removal itself isn’t hard—it’s just repetitive work that gets dusty fast. The real time commitment comes after, when you’re sealing everything back up. That means patching holes, applying joint compound (also called mud), sanding it smooth, and finishing the surface. How much damage you have directly affects how long this takes.
Think of it as prep work that’s necessary but not exciting. Getting drywall repair right matters because you’re building a proper foundation for moisture barriers and shower infrastructure. Skip the details here, and water will find its way into places it shouldn’t be later on.
Shower Pan Installation
Once your drywall’s patched and your waterproof barriers are sealed, it’s time to install the shower pan. This step matters more than it sounds because you’re creating a watertight container that stops water from leaking down into your floor structure below.
Your contractor will carefully position and secure the pan, making sure it slopes toward the drain. Water needs to flow downhill naturally, or you’ll end up with standing water and eventual damage. The slope is usually about one-quarter inch per foot, which doesn’t sound like much but makes a real difference in how things perform.
Once the pan is in place, you’ll fill it with water and let it sit for several hours. This test shows whether water drains correctly and whether any leaks sneak out around the edges or seams. It’s boring to watch, but it’s the part that catches problems before your tiles go down.
An inspector will visit next to verify the installation meets code. Think of this as your bathroom’s safety checkpoint. The combination of proper drywall repair and a well-installed pan keeps your remodel moving forward toward tile and fixtures without unexpected water problems down the road.
Week 3: Tile and Final Finishes
Week 3 is when your bathroom actually starts looking like a bathroom instead of a construction zone. This is the tile and finishes phase, and it’s where you’ll see the biggest visual payoff.
Week 3 marks the shift from construction chaos to actual bathroom—where tile and finishes deliver the visual payoff you’ve been waiting for.
The process follows a pretty logical order. First, workers prepare the backing substrate—basically a sturdy base layer that holds the tile. Then they apply mortar, which acts like a sticky glue underneath each tile. Next comes actual tile placement, and here’s where your choices matter: smaller tiles take way longer to install than larger ones because there are more pieces to position and more grout lines to fill. A 12×24 inch tile goes down faster than a 6×6 inch tile, even though both look good. Finally, grout fills all the gaps between tiles and hardens everything into place.
Timing depends partly on complexity. Simple subway tile layouts move quickly. Diagonal patterns, mixed sizes, or intricate designs can eat up extra days or even push things into Week 4. Shower walls with waterproofing requirements also add time. It’s worth asking your contractor upfront how long they estimate for your specific tile pattern.
This phase marks a shift in the whole project. You’re moving away from rough work and toward the polished stuff. Plumbing and electrical finalization happen around the same time too, so multiple crews might be working in your space simultaneously. Stay flexible with deadlines during this week. Cracked tiles, thin-set issues, or unexpected substrate problems can pop up, and they’re worth fixing properly rather than rushing through them.
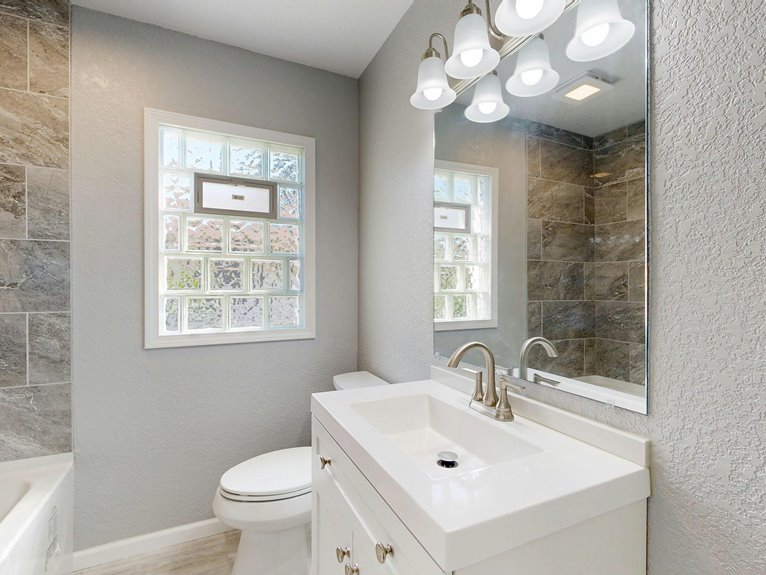
Week 4: Fixtures and Project Closeout
By Week 4, you’re wrapping up all the work that started in those first few weeks. Now comes the part where everything actually starts looking like a real bathroom instead of a construction zone. Your team will install vanities, faucets, mirrors, and lighting fixtures while carpenters finish the trim and painters do their final coats.
As the week moves along, your superintendent puts together a detailed punch list. This is basically a checklist of anything that still needs attention—small stuff like caulking gaps, loose hardware, or paint drips. You and your superintendent walk through the space together and mark down whatever needs fixing. Once you’ve tackled everything on that list, you’re done.
The whole process usually wraps up with a final walkthrough where you check the water pressure on those new faucets, test the light switches, and make sure cabinet doors close properly. It’s not glamorous work, but it’s the difference between a bathroom that works and one that has little problems popping up for months. After you’ve signed off on everything, your newly remodeled bathroom is ready to use.
Lock In Decisions Early: or Pay in Delays
 5")
What’s the costliest mistake homeowners make during a bathroom remodel? Waiting to decide things while work’s already happening.
The costliest mistake homeowners make during a bathroom remodel? Waiting to decide things while work’s already happening.
You’ll want to finalize your planning and major design choices before demolition begins. Here’s why: mid-project changes create domino effects that derail your timeline and drain your budget.
Before the sledgehammers come out, nail down these decisions:
- Layout and fixture placement so plumbers and electricians can coordinate without stepping on each other
- Finish selections like tile, paint, and flooring so materials show up when you need them
- Custom or imported items that take weeks or months to arrive
- Hardware and accessories so you’re not scrambling for last-minute substitutions
- Plumbing and electrical routing before walls come down
When you’ve settled these details upfront, your contractor can work smoothly without stopping and starting. Add at least 15% to your budget estimate for the unexpected issues that always pop up. A bathroom remodel with solid planning stays on track. One without it turns into a months-long headache and an empty wallet.
Permits and Inspections: Built-In Waiting
 6")
Even with every decision locked down before day one, you’re not ready to swing that sledgehammer yet. You’ll need permits and inspections—the bureaucratic gatekeepers of your project. These approvals can take weeks or even months, and work simply can’t start until you’ve got that official paperwork in hand.
Experienced contractors know how to navigate the permit process, but here’s the thing: they can’t control the backlog at your local building department. Local inspectors check your work at key milestones like plumbing and electrical installations. Each inspection typically adds 1–3 days to your timeline. If you decide mid-project to change something—maybe you want a different tile layout or decide to relocate a light fixture—you’re looking at additional inspections that push your schedule further out.
Think of permits and inspections as built-in waiting periods. They’re frustrating, but they’re also the reason your home stays safe and holds its value. When you go into a project expecting these checkpoints rather than treating them as surprises, you’ll feel less stressed when they happen. Building this waiting time into your timeline from the start makes your actual completion date feel more realistic.
When Tile and Fixtures Don’t Arrive on Time
 7")
When your dream tile or that custom vanity you ordered months ago doesn’t show up when the contractors need it, your whole project hits pause.
Tile delays and backordered fixtures stall progress all the time. Standard in-stock items arrive quickly, maybe a week or two. Custom pieces? Those take weeks or even months. Material availability issues create real scheduling headaches for your entire team.
Here’s what actually works:
- Order all materials upfront, including backup options. If you love a specific tile but it’s backordered, pick a second choice before you sign the contract.
- Request lead time estimates before you buy anything. A supplier can usually tell you when something arrives.
- Confirm delivery dates with suppliers weekly as the project gets closer. Things change, and staying on top of it beats getting surprised.
- Keep alternative tile and fixture selections ready. You don’t need to order them, just know what you’d pick if your first choice falls through.
- Schedule deliveries around your contractor’s timeline. If your tile arrives three weeks before they’re ready to install it, it just sits on your bathroom floor.
When you anticipate these delays ahead of time, your contractors can keep working instead of waiting around. Your remodel stays on track because you’ve actually planned for what happens in real bathrooms.
Mold, Rot, and Framing Issues: Unexpected Costs and Delays
 8")
When your contractor opens up bathroom walls during demolition, you might discover hidden water damage, rotting wood framing, or mold that wasn’t visible before. These discoveries will stretch both your timeline and budget. If the framing is compromised, you’ll need specialized contractors—sometimes structural engineers or mold remediation companies—and potentially several rounds of inspections to confirm everything is safe.
This is where a contingency buffer matters. Adding an extra week or two to your schedule helps you handle these surprises without completely derailing your project. A contingency fund of 10-20% of your total budget is also smart. So if your bathroom renovation costs $10,000, set aside $1,000-$2,000 for unexpected issues.
Water damage and mold removal can run anywhere from $500 to $3,000 depending on the extent. Replacing rotted framing typically costs $800-$2,500 per affected section. These costs add up quickly, but catching problems early during demolition beats discovering them after your walls are already finished.
Hidden Water Damage Discovery
What happens when your contractor opens up that bathroom wall and suddenly discovers mold creeping across the framing or soft, rotted wood where sturdy studs should be? Your remodeling timeline just shifted dramatically, and hidden water damage is often the reason why.
When these issues show up, you’ll need to handle several things at once. Specialized mold remediation crews need to inspect and clean the damage, which takes time. Structural repairs might extend your project by days or weeks depending on how bad things are. You could find that plumbing or framing layouts need redesigning, which means reordering materials. Labor costs climb faster than you expected because the work gets more complicated. This is exactly why setting aside a contingency buffer—both money and extra time—matters so much. It’s your safety net when surprises emerge behind those walls.
Water damage creates unpredictable delays because your bathroom walls reveal what’s been sitting hidden for months or even years. A typical mold remediation project runs $2,000 to $6,000, though structural repairs can push costs much higher depending on the extent of the damage. Building that financial cushion and scheduling flexibility isn’t something to skip over. It’s what keeps your project from derailing completely when reality doesn’t match your original plan.
Structural Framing Replacement Needs
Once mold remediation crews finish their work, you’re often left staring at the real problem—damaged framing that needs to be replaced. This kind of work isn’t fast, and it definitely costs money. You’ll need extra inspections to figure out how far the rot has spread, which means the building codes kick in and add more time to your project.
Here’s the typical timeline: replacement usually happens during the rough-in phase, right when plumbing and electrical crews are ready to jump in. That delay creates a domino effect across your whole project. Your contractor has to carefully pull out the bad materials, make sure everything dries properly with good airflow, and rebuild the structure safely.
The crews who’ve done this work many times before know how to spot these problems early and avoid doing things twice. They keep the project moving forward. Even with that experience, though, structural replacements are one of the biggest reasons bathroom remodels take longer than expected. Plan for extra time and budget—it’s just what happens when you open up the walls.
Timeline Extension and Budget Impact
When you open up a bathroom wall and find mold or rotting framing, you’re not just dealing with a cosmetic fix anymore. You’re looking at anywhere from a few days to several weeks of delays, depending on how bad things are hiding behind the drywall.
Mold remediation alone typically pushes your project back by 5–14 days. Add in the permits and inspections that come with it, and you’re looking at mandatory waiting periods that are just part of the process now. Structural repairs need extra contractor visits. Materials you didn’t plan on might be backordered. Water damage assessment takes time. It all stacks up fast, especially in older homes where walls seem to have a talent for keeping secrets.
The real fix here is building a 15% contingency buffer into your budget from the start. That cushion absorbs the unexpected costs without falling apart when something goes sideways. Plan your designs early and pre-order your materials ahead of time so delays don’t pile on top of each other. A bathroom remodel at a big-box store like Home Depot might run $5,000–$15,000 depending on scope, but that 15% buffer means setting aside $750–$2,250 just for the “oh no” moments. It sounds like a lot until the inspector finds that soft spot in your subfloor and you’re already covered.
Build in a Safety Buffer for Delays
 9")
Ever notice how bathroom projects seem to take longer than expected? That’s where buffering comes in. You’ll want to add at least a 15% cushion to your timeline. This extra time absorbs surprises like hidden water damage or permitting delays that would otherwise throw off your schedule.
Think of your buffer as breathing room for your project. When material deliveries slip or contractors don’t show up on time, you’ve got flexibility to handle it. This approach keeps your team calmer and lets you solve problems before they become bigger headaches.
| Delay Type | Impact | Buffer Strategy |
|---|---|---|
| Permitting | 2-4 weeks | Add 3 weeks |
| Materials | 1-3 weeks | Plan ahead |
| Hidden damage | 1-2 weeks | Reserve time |
| Trade delays | 3-5 days | Schedule buffer |
A realistic schedule with built-in cushion becomes your real advantage. Life gets messy, and planning for that upfront means fewer scrambles down the road.
Fit the Remodel Around Your Life
 10")
Timing your bathroom remodel isn’t just about what works for your contractor—it’s about what works for you and your family. Your bathroom remodel timeline needs to fit your life, not the other way around.
Start by thinking about when you’ll actually need your bathroom back. If you’re a family of four sharing one bathroom, faster progress matters a lot more than if you have multiple bathrooms to use. Schedule demolition during times when you can use another one, and coordinate with your contractor about working hours that keep disruption to a minimum. Planning ahead for custom tiles or fixtures can take months, so getting those orders in early prevents delays later on. Also, try to avoid starting a remodel right before major holidays or during busy seasons when contractors get backed up.
Build contractor coordination into your family calendar from the start. When you discuss your lifestyle needs early on, your contractor can adjust the bathroom remodel timeline to work with your schedule while keeping the quality of the work high. This conversation at the beginning saves headaches down the road.
Five Ways to Speed Up Your Bathroom Remodel
 11")
Once you’ve figured out how to fit the remodel into your life, the next step is speeding things up. Good planning really does cut your timeline down. Here’s what actually works:
Hire a contractor who handles all the trades instead of managing multiple people yourself. When one person coordinates plumbers, electricians, and tile installers, you skip those awkward gaps where nobody’s working and time just disappears.
Make your design choices early. Pick your fixtures, tile, paint colors, and everything else before work starts. Special orders can add weeks, so stick with materials that are already in stock at your supplier. If you change your mind halfway through, contractors have to stop work while new items arrive.
Budget for surprises. Add at least 15% extra to your contractor’s estimate. Walls hide things—old plumbing, wiring, mold—and you’ll want money set aside when something unexpected shows up.
Talk to your contractor every single day. A quick five-minute conversation catches problems before they become real delays. You’re both working toward the same finish line, and staying in touch keeps that momentum alive.