
Standard bathroom dimensions start with understanding your room’s footprint and how fixtures fit within it. Compact bathrooms run 3×6 to 4×7 feet, while standard ones span 6×6 to 6×8 feet. You’ll need at least 24 inches of clearance around each fixture and 30 inches for walking space between them.
Door swings matter more than most people realize. A standard hinged door can eat up valuable floor space fast, which is why pocket doors are worth considering if your budget allows. A basic pocket door kit runs around $150 to $400 depending on quality, and you’ll save roughly 10 to 12 square feet of usable space compared to a swinging door.
Getting these measurements right prevents costly mistakes during planning and construction phases. Grabbing a tape measure and sketching out your bathroom layout before you buy fixtures or start renovations takes maybe an hour and saves headaches down the road.
Why Bathroom Dimensions Matter for Your Project

Why does size matter when you’re planning a bathroom? Because the actual measurements of your space directly impact how well everything works. You’ll want to understand these dimensions before making any design decisions.
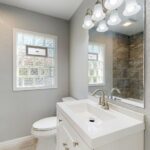
When you’re working with a typical 7 x 5 ft bathroom, every inch counts. Your door swing layout determines whether you’ll navigate the space comfortably or feel cramped during your morning routine. A poorly planned door can steal precious floor space and make daily life annoying.
Knowing standard bathroom dimensions helps you avoid costly mistakes. You’ll understand fixture clearances—like the 24 inches needed in front of your toilet—before installing anything. This knowledge lets you decide confidently whether you can fit that double vanity or need a slimmer option instead. Smart planning means your bathroom actually works for you instead of against you.
Bathroom Size Categories: Compact, Standard, and Master

Bathrooms come in three main size categories, and knowing which one matches your space helps you plan better. Compact bathrooms measure 3 x 6 to 4 x 7 feet, which means you’re working with tight dimensions like you’d find in apartments or smaller homes. These spaces need wall-mounted fixtures and clever storage solutions to make the most of every inch. Standard bathrooms range from 6 x 6 to 6 x 8 feet, giving you enough room for a vanity, a separate shower, and comfortable movement between zones. Master bathrooms start at 8 x 10 feet or larger, which opens up possibilities like double vanities, spacious walk-in showers, or a relaxation area.
Each size category shares one thing in common: they work best when you prioritize proportional fittings, adequate clearance around fixtures, and functional storage. The goal isn’t fancy or complicated. It’s about keeping things flowing smoothly so your bathroom actually works for your daily routine.
Door Width and Swing Clearance: Non-Negotiables

How much space does your bathroom door actually need? You’ll want a door width of at least 28 to 32 inches for standard bathrooms, though 36 inches is ideal if you’re planning for accessibility. Your door swing clearance matters just as much as the width itself. When you open that door, it shouldn’t hit your toilet, vanity, or shower.
In tight spaces, traditional swinging doors can eat up floor area fast. Pocket doors and sliding doors slide into the wall instead, giving you back that precious space. They cost a bit more upfront—typically $200 to $500 for a basic pocket door kit compared to $50 to $150 for a standard swinging door—but they work well in compact bathrooms. Brands like Johnson Hardware and Knape & Vogt make reliable kits that homeowners install without too much trouble.
Planning your entrance now means you’ll avoid frustrating collisions later and keep your bathroom functional as your needs change.
Fixture Activity Zones: Clear Space Requirements

Now that you’ve settled on your door setup, it’s time to think about the space inside—specifically, how much room your fixtures actually need to work well. You’ll want at least 24 inches of clear space around each toilet, sink, and shower. If you share the bathroom with others, aim for 30 inches instead. It might not sound like much, but that extra six inches makes a real difference when two people are getting ready at the same time.
These activity zones aren’t just nice additions. They’re what keeps your bathroom from feeling like a closet. Without proper clearance, you end up doing that awkward shuffle around the sink or bumping your hip on the toilet every time you turn around. It’s the kind of thing you don’t notice until it’s missing, and then you notice it constantly.
Think about your daily routine. You brush your teeth, you need space to open the cabinet door fully. You shower, you need room to step in and out without tripping. You use the toilet, you need enough space to actually sit down without your knees hitting the sink. These aren’t complicated requirements—they’re just about basic comfort and safety in a space you use multiple times a day.
Clearance Around Fixtures
What’s the sweet spot for moving around your bathroom without feeling like you’re navigating an obstacle course?
You’ll want to plan your clearance strategically around each fixture. The numbers matter more than you might think.
Activity clearance means having at least 24 inches of open space directly in front of sinks, toilets, and showers. This is the bare minimum so you can actually use them without doing a sideways shuffle or bumping your elbows into walls.
Circulation clearance asks for 30 inches between fixtures when you’re walking through. In bathrooms where two people share the space, this distance keeps things from feeling like a traffic jam.
Turning space is where a 60-inch diameter circle comes in handy. If someone uses a wheelchair or a walker, or if you just want your bathroom to feel less cramped, plan for this radius. You’d be surprised how much difference those extra inches make when you’re getting ready in the morning.
Door swings eat up floor space faster than you’d expect, so pay attention to where your door opens. In smaller bathrooms, putting all your fixtures on one wall instead of spreading them out actually gives you more room to move. It sounds backwards, but lining things up creates a clearer path from the door to the rest of the space.
Activity Zone Spacing
Each fixture in your bathroom needs its own breathing room. You’ll want at least 24 inches of clear space around your sink, toilet, and shower so you can move comfortably without bumping into things. In larger bathrooms or shared spaces, bump that up to 30 inches for walking space between fixtures—this keeps traffic flowing smoothly instead of creating a bottleneck.
Think of it like creating invisible bubbles around each fixture. When you plan your layout, imagine yourself actually using each spot. Can you realistically dry off by the sink without twisting awkwardly, or would you end up doing some kind of bathroom contortion? Can guests navigate past you at the toilet without squeezing sideways? These real questions guide spacing decisions that make your bathroom actually work for the people using it, rather than feeling cramped and awkward.
Accessibility Clearances: Planning for Everyone

When you’re designing a bathroom that works for everyone, you need to think about how much room people actually need to move around. This matters a lot if you’re planning for wheelchair users or anyone with mobility challenges.
Start with your doorway. Most accessible doors need to be at least 32 inches wide. This sounds narrow until you try fitting a wheelchair through a smaller opening—then you understand why those extra inches matter. The space inside the bathroom matters just as much. A wheelchair needs about 60 inches to do a full turn, which is roughly the size of a circle you could draw with a 30-inch radius from the center point. Check your bathroom layout and see if you can fit that invisible circle in key spots like near the toilet and sink.
Grab bars are another important piece. They’re not just safety equipment that happens to look industrial. A good grab bar like the Moen SecureMountTM line (around $40 to $80 per bar) grabs firmly because it’s bolted into the studs behind your walls, not just stuck to the surface. You want these bars positioned where someone actually uses them—beside the toilet, in the shower, near the tub edge—rather than placed randomly. When bars are placed right, they feel natural to reach for and actually support your weight.
Getting these clearances right keeps your bathroom functional and welcoming for family, guests, and anyone who might visit.
Wheelchair Turning Radiuses
Wheelchair Turning Radiuses
When you’re planning a bathroom for someone who uses a wheelchair, fitting through the doorway is just the start. The real challenge is having enough room to move around comfortably once you’re inside.
You’ll want a circular space with a 60-inch diameter so someone can complete a full 360-degree turn without feeling cramped. Around the sink, toilet, and shower, keep at least 24 inches of clear space for safe maneuvering and reaching. Between doorways and fixtures, plan for about 30 inches so people can navigate the room without awkward shuffling.
A standard 28-32 inch door feels tight in most cases. Upgrading to a 36-inch door makes a noticeable difference in how easy the space feels to use. When you’re laying out your bathroom, think about these turning spaces early on rather than trying to squeeze them in later. Smaller bathrooms need careful planning, but it’s definitely doable with some thought about where things go.
Grab Bar Placement Standards
Grab bars need to go in specific spots to actually work. The standard height for horizontal bars is 34–38 inches above the floor, which gives most people a comfortable reach without stretching or bending awkwardly. Near toilets and showers, position them at least 1.5 inches away from the wall. If you’re putting up multiple bars, space them about 12 inches apart so you have continuous support as you move along.
In shower areas, a horizontal bar along the back wall works well for stability, and a vertical bar near the entrance helps you step in and out safely. Think of it like having handholds at the spots where you’re most likely to slip or lose your balance.
The installation part matters just as much as placement. Your bars need secure studs or solid wall anchors that can actually handle your weight—look for ones rated for at least 250 pounds. Anti-slip surfaces keep your hands from sliding, which defeats the whole purpose. Popular options like Moen SecureMountTM bars (usually $40–80) come with clear instructions and multiple anchor options depending on your wall type. Installation takes a few hours with basic tools, and it’s worth taking your time to get it right.
Doorway Width Requirements
Getting grab bars in the right spots keeps you safe when you’re moving around, but if you can’t actually get into your bathroom easily, those bars won’t help much. Your doorway width directly impacts how accessible your whole bathroom becomes.
Standard doorway widths range from 28–32 inches, though 36 inches works better for comfortable movement and wheelchair access. When you’re planning your door swing, think about where it opens and whether it’ll block your toilet, vanity, or shower. Nobody wants to squeeze past a door that’s swinging into the sink.
If you’re working with a tight space, sliding or pocket doors are worth considering. They take up way less room than a traditional hinged door since they don’t swing out into your bathroom. A basic pocket door kit runs around $150–$300, depending on the quality and size. The trade-off is that installation takes a bit more effort than a standard door, but many people find it worth it once they see how much floor space they gain back.
Thinking through these details now saves you headaches later. You’re not just building a bathroom—you’re creating a space where everyone can move confidently and safely.
Vanity Height, Depth, and Front Clearance Specs
When you’re standing at your bathroom sink brushing your teeth or washing your face, you probably don’t think much about the measurements that make it comfortable—but they’re actually pretty important. Your vanity height should fall between 32 and 36 inches, with 35 inches hitting that sweet spot for most people. This prevents you from hunching over or straining your back during your morning routine.
You’ll also want about 30 inches of front clearance minimum so you can approach the sink without feeling cramped. A standard vanity depth of 21 inches works well for most bathrooms, giving you adequate workspace without eating up precious floor space. Getting these dimensions right means you can actually move around comfortably instead of bumping into things.
When you plan your bathroom layout, consider how your vanity fits with other fixtures nearby. A toilet that’s too close or a shower door that swings the wrong way can make your whole space feel smaller than it actually is. Taking time to measure and sketch things out before you buy anything saves you from expensive mistakes later.
Double Vanity Spacing and Toilet Positioning
When you’re planning a double vanity with a toilet in the same bathroom, think about how your family actually moves through the space—not just what fits on paper. You’ll want to keep your sinks about 30 inches apart (center to center) so two people can wash up without bumping elbows. At the same time, your toilet needs to sit at least 15 inches away from any wall or fixture on either side.
The real trick is giving yourself enough breathing room. Aim for 24 to 30 inches of clear space in front of both the vanity and toilet so nobody’s doing an awkward shuffle just to use the sink or sit down. This spacing matters more than you’d think when you’re actually living with the layout day to day. A standard 48-inch vanity with two sinks works well in most bathrooms and usually costs between $300 and $800 depending on materials and finish. Pair that with a round or elongated toilet positioned properly, and you’ve got a bathroom that actually functions when everyone’s getting ready at the same time.
Double Vanity Sink Spacing
How do you fit two people comfortably at the bathroom sink without them bumping elbows? Understanding double vanity sink spacing makes sharing bathroom time way less awkward.
The spacing that actually works
Aim for 30 inches of space between sink centers. This gives you genuine elbow room when you’re both brushing teeth or washing hands at the same time. It’s the difference between a quick morning routine and constant shuffling around each other.
Vanity width matters more than you’d think
Choose a vanity that’s 60 to 72 inches wide for bathrooms where two people actually use it together. A 60-inch vanity gives you breathing room without feeling cramped. You’re not fighting for counter space or constantly adjusting positions. Position each sink about 15 inches from the vanity’s center to balance the layout nicely.
Why this setup works in real life
That center-to-center spacing rule prevents the frustrating collision zone where you can’t both reach the sink comfortably. Proper vanity width removes the daily annoyance of sharing bathroom time, especially if you’re living with a partner or roommate. It’s the kind of detail that sounds small until you’re dealing with a cramped setup every single morning.
Toilet Clearance Requirements
You’ve got your double vanity all figured out, but your toilet placement deserves the same careful thought. It’s one of those things that seems simple until you’re sitting in a bathroom that feels too tight.
Here’s what actually matters. You need at least 24 inches of space in front of the toilet so you can sit without feeling squeezed. From the toilet’s center, keep 15 inches of clearance to any walls or cabinets nearby. This basic spacing prevents that awkward shuffle you’ve probably experienced in cramped bathrooms.
| Clearance Type | Minimum Distance | Why It Matters |
|---|---|---|
| Front clearance | 24-30 inches | Comfortable seating and easy movement |
| Side clearance | 15 inches | Room to move your arms without hitting walls |
| Width | 30 inches | Standard toilet sizing |
| Door swing | Clear path | People can move through without obstacles |
Position your toilet away from where doors swing open and keep it separate from your vanity area. When you get these measurements right, your bathroom actually feels spacious enough for everyone using it, even in smaller homes where square footage is limited.
Shower Dimensions: Minimum Viable vs. Comfortable

What’s the difference between a shower that barely works and one that actually feels good to use? It’s all about shower dimensions and space planning.
You’ve got two basic options here. A 30″ × 30″ shower technically meets building code, but you’ll feel cramped when turning around or washing your hair without bumping walls. Step up to a 36″ × 48″ footprint, and you get real movement and comfort. You’re not negotiating with your own elbows anymore.
If you’re working with a compact bathroom, the smaller size works. But if you have the space available, that extra room makes your shower feel less like a chore and more like an actual place you want to be in the morning.
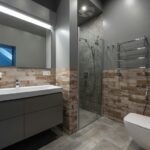
Large format tiles like 600 × 1200 mm options can help tight spaces feel bigger by reducing the number of grout lines you see. This visual trick works especially well in smaller bathrooms where every bit of perceived space counts.
Bathtub Placement and Surround Clearance

When you’re planning where your bathtub goes, clearance matters more than you’d think. It’s the difference between a relaxing soak and feeling like the walls are closing in. You’ll want at least 24 to 30 inches of clear space in front of your tub for comfortable entry and exit. This simple measurement prevents stubbed toes and awkward scrambling when you’re getting in or out.
Standard tubs measure 60 inches long by 30–32 inches wide, which takes up real estate quickly. Aim for a minimum of 6 inches around all sides for surrounding fixtures and walls. If you’re installing a hinged glass enclosure or door, you’ll need extra space for it to swing open without hitting anything. Glass enclosure doors typically add 4 to 8 inches to your clearance needs, depending on the model.
For aging-in-place designs or if you want extra flexibility down the road, create a 60-inch turning diameter nearby. This gives you enough room to maneuver a wheelchair or walker safely, without cramping your daily routine. Think of it as building in wiggle room for life’s changes.
Towel Bars, Hooks, and Mirror Heights

Where exactly should you hang your towel bar? Getting these heights right makes your bathroom work better for everyone in your family.
Towel bars belong 42–48 inches above the finished floor. This puts them at a comfortable reaching height for grabbing a towel during your daily routine without stretching too far or bending down awkwardly.
Towel hooks and robe hooks go higher at 60–70 inches. Placing them up there keeps your bathrobe and extra towels out of the way so they don’t take up valuable space near your sink and counter.
Mirror heights typically sit 5–10 inches above your counter and around 60–65 inches from the floor. This aligns with where most people’s eyes naturally rest, so you’re not craning your neck to see yourself while brushing your teeth or getting ready.
These measurements work for most people, but your family might need slight adjustments. If someone in your household is taller or shorter than average, shifting things up or down a few inches makes real sense. When you get these placements right, your bathroom actually feels like someone thought it through.
Sample Layouts: How Dimensions Work Together

How do you fit a toilet, sink, and tub into a space that feels cramped?
A one-wall layout does exactly that. You’ll arrange all three fixtures along a single wall, which simplifies plumbing and opens up your floor. This design works brilliantly in compact bathrooms measuring 7’–9′ wide and 5’–6′ deep.
| Layout Type | Width | Depth |
|---|---|---|
| Compact One-Wall | 7’–9′ | 5’–6′ |
| Activity Space Needed | 24″ clearance | Per fixture |
| Circulation Space | 30″ minimum | Shared use |
The trick is using sliding doors instead of swinging ones, which can eat up floor space fast. Wall-mounted sinks and toilets help too. You’ll want to position your sink for easy access, then place the toilet and tub strategically along that wall. This keeps everything within arm’s reach while maintaining proper clearances so the room doesn’t feel like a puzzle you’re trying to solve every morning.
Choosing Tile Size to Match Your Bathroom Dimensions

Your tile choice matters more than you’d think—it’s not just about looking good, but also about making your bathroom feel bigger or cozier depending on what you need.
Larger formats work best in tight spaces
When you’re working with a smaller bathroom, bigger tiles actually help. A 600 x 1200 mm tile or even a 300 x 600 mm option creates fewer grout lines across your walls, which tricks your eye into seeing more space. It’s the same reason designers often recommend larger tiles in cramped areas. You’ll notice the difference when you’re standing in the room—it just feels less chopped up.
Shower stalls need the right sizing
Your shower dimensions really do matter. Whether you have a compact 30 x 30 inch stall or a roomy 36 x 36 inch space, larger tiles give you that seamless, professional look that’s easier to maintain. Small tiles in showers mean more grout lines to scrub, and grout can get moldy faster if you’re not careful about ventilation.
Full wall coverage protects your bathroom
Tiling your entire wet areas with durable, easy-maintenance finishes protects the walls underneath from water damage while keeping cleanup simple. It’s a practical choice that pays off over time, especially in bathrooms with high moisture.
Measuring Your Existing Bathroom: What to Document

Before you pick out tile styles or plan where fixtures go, you need to know exactly what you’re working with. Start by measuring your walls from corner to corner to get your room’s full length and width. Don’t skip alcoves or odd protrusions—they matter when you’re figuring out how to use your space well.
Ceiling height deserves attention too, since it affects what you can install above your toilet or vanity. Document your door width and which way it swings so nothing blocks your new layout. This is one of those details people often forget about, then regret when their new cabinet won’t open all the way.
Mark where your toilet, sink, and shower currently sit, including their centerlines. Note any existing niches, radiators, or built-ins that’ll influence where your vanity goes. These details prevent costly mistakes later and help you visualize your redesigned bathroom accurately.
From Measurements to Construction: Your Next Steps

Once you’ve got your measurements down, it’s time to turn those numbers into an actual plan. This is where things get real. You’ll want to sketch out a layout using graph paper or a free app like RoomSketcher. Position your toilet, vanity, and shower while respecting those 24-inch clearances around each fixture and leaving at least 30 inches of walkway space.
After you’ve got a layout that works for your space and how you actually live, start thinking about materials and contractor quotes. Look up the actual construction timeline for your area—bathroom renovations usually run two to four weeks depending on scope. Nailing down a functional plan first saves you money and headaches down the road. You’ll know exactly what you need before contractors start writing estimates, which means fewer surprises when the bills come in.
Measurement and Planning Execution
Map your fixtures strategically
Position your toilet, sink, and shower where they won’t block doorways or create awkward traffic patterns. Think about how you’ll actually move through the room from entrance to exit. If your toilet sits right in the path between the door and sink, you’re going to feel cramped every time you use the bathroom.
Account for minimum clearances
You need at least 24 inches of space around each fixture and 30 inches of clear floor space to walk through comfortably. These aren’t random numbers—they’re the difference between squeezing past everything and actually moving naturally through the room. A standard bathroom might feel tight, but proper spacing makes it feel functional instead of frustrating.
Consider space-saving solutions
Wall-mounted vanities and pocket doors work well in smaller bathrooms, especially those around 35–54 square feet. A wall-mounted vanity like the Kohler Bancroft ($200–$400 depending on style) takes up less floor space than a traditional cabinet while giving you the same storage. Pocket doors slide into the wall instead of swinging out, which saves about 10 square feet compared to a regular hinged door that needs clearance to open.
Your layout should flow naturally from how you actually use the space. This phased approach—measuring first, then planning your layout, then placing fixtures—keeps everything fitting within your real dimensions instead of forcing your space into a generic blueprint.
Construction Implementation Guidelines
Now that you’ve got your measurements locked in and your layout planned out, it’s time to actually build it—and that’s where things get real. Before you order materials or call contractors, double-check those space dimensions. Use painter’s tape to mark your wall clearances. Walk through your bathroom physically and confirm everything feels right. This simple step prevents expensive mistakes later.
When you’re ready to install fixtures, verify that your toilet has that 24-inch front clearance and your shower dimensions match your actual space. A compact 30 x 30-inch shower works for tight bathrooms, while a 36 x 36-inch gives you more room to move around. If you’re using sliding doors to maximize a small space, have your contractor confirm that door swing paths actually work. Small adjustments now save big headaches during construction.