
You can get rid of bathroom urine odor in about 24 to 72 hours using vinegar or shaving cream. The key is that these actually kill the bacteria causing the smell rather than just covering it up with air freshener.
Start by finding where the urine smell is hiding. Check grout lines, the base of the toilet, corners, and anywhere moisture tends to gather. Once you’ve spotted the problem areas, apply your cleaner and let it sit for 10 to 15 minutes so it can really work on breaking down the bacteria. Then scrub the area, dry it completely, and run a fan or dehumidifier to keep moisture from building back up.
For spots that stick around even after the first round of cleaning, enzyme cleaners like Nature’s Miracle work well. These products break down the urine crystals that regular cleaners sometimes miss. Nature’s Miracle costs around $8 to $12 per bottle and handles both the smell and the source.
Keep odors from coming back by wiping down bathroom surfaces daily and doing a deep clean once a week. This regular maintenance stops the problem from getting worse in the first place.
Step 1: Choose Your Urine Odor Cleaner-Vinegar or Shaving Cream

When that stubborn bathroom smell won’t quit, you have two solid options: vinegar or shaving cream.
Vinegar is probably already in your kitchen or under the sink. The acid in vinegar kills the bacteria that causes the smell instead of just covering it up. White vinegar costs about $2-4 per bottle and works on most bathroom surfaces.
Vinegar kills odor-causing bacteria rather than masking smells, costs just $2-4, and works on most bathroom surfaces.
Shaving cream tackles the same problem. It costs roughly $3-6 per can and works just as well as vinegar at attacking odor-causing bacteria. The bonus is that shaving cream fits into tight spots like caulk lines where urine gets trapped and lingers.
Both options address the actual source of the problem rather than masking it with air fresheners. Pick whichever you already have at home. Either one will handle the job with simple chemistry on your side.
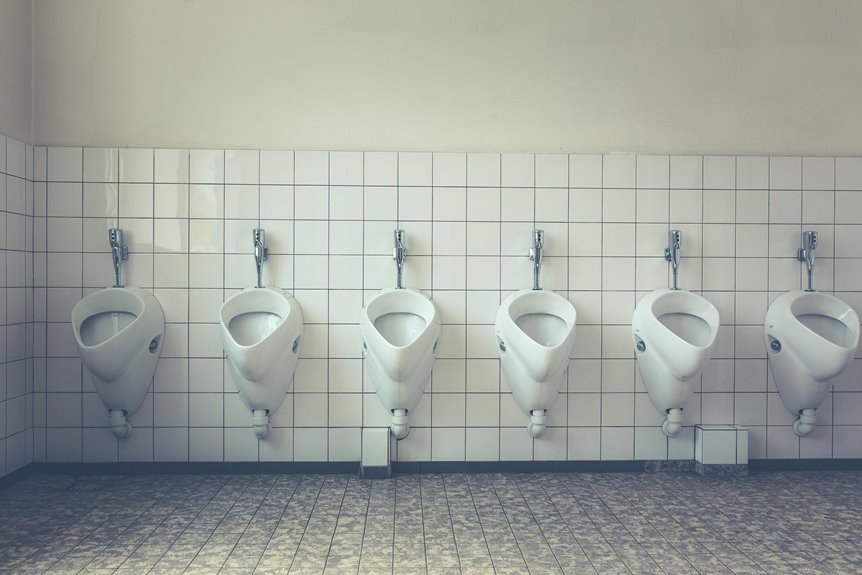
Step 2: Locate Your Bathroom’s Urine Odor Sources

Where’s that bathroom smell actually coming from? You’ll need to look beyond the obvious spots. Check the grout lines between your tiles and the caulk around your toilet base. These porous materials soak up urine and bacteria deep inside, so they keep releasing odors even after you’ve scrubbed the surface clean.
Peek underneath the toilet bowl’s base where moisture tends to accumulate, and look at gaps between tiles. Most people miss these hidden zones on their first pass. Once you pinpoint where the smell is hiding, you’ll know exactly where to focus your cleaning efforts for results that actually last.
Step 3: Apply Your Chosen Cleaner to Affected Areas

You’ve got two solid options for this step: white vinegar, which costs around $2-3 at most grocery stores, or shaving cream if you already have some at home. Pick whichever works best for you.
Spray or spread your chosen cleaner directly onto the toilet base, grout lines, and the surrounding floor. Make sure you cover all the spots where urine might have settled, including corners and edges that are easy to miss. Let it sit for 10-15 minutes so the cleaner can break down the bacteria causing the smell. If the odor is really stubborn, you might want to wait a bit longer before moving to the next step.
The reason being thorough matters here is simple: bacteria can hide in small cracks and crevices. A quick spray-and-wipe won’t cut it. Take your time and apply enough cleaner that the affected areas stay wet during the sitting period. You’ll know you’ve done it right when the area looks adequately dampened and smells like vinegar or shaving cream rather than urine.
Vinegar Application Method
How’s the vinegar working out for you so far? You’re about to see why so many of us swear by it. Pour or spray enough vinegar to wet the affected areas evenly—the floor, grout lines, and around your toilet base. Don’t skimp here; you want full contact with those urine residues.
Let it sit for a few minutes while the acid does its work, penetrating surfaces and killing bacteria hiding in your bathroom. For caulk lines and porous spots, apply vinegar generously so it seeps into crevices where urine likes to hide.
Once your wait time’s up, buff the area with a clean towel or brush to lift residues and bacteria right off. Then wipe everything down with a dry towel and mop thoroughly to remove any remaining vinegar and prevent slippery floors.
Shaving Cream Alternative Technique
Ready to try something different? Shaving cream actually works well for tackling urine odor in bathrooms. Shake your can thoroughly, then apply it with a towel to affected areas around the toilet base and along the caulk line where bacteria tend to hide.
Let the cream sit for about 10-15 minutes. The high acidity does the heavy lifting the same way vinegar does. After that, buff the area with a clean towel to distribute the product and lift away residues. Wipe everything down with a dry towel afterward to prevent slipperiness.
The key here is that you’re addressing the actual bacteria causing the smell, not just covering it up. Follow up with regular floor cleaning to remove any remaining shaving cream. Most cans of basic shaving cream run between $2-4, so it’s an inexpensive option to have on hand if you need it.
Step 4: Scrub and Buff Grout and the Toilet Base to Lift Residue

Now that you’ve tackled the surface, it’s time to get into the spots that hide the most urine residue. Grout lines and the toilet base are bacterial havens, so grab your scrub brush and a mild cleaning solution. Mix water with a cleaner you like—something like Clorox Bleach Pen ($3-5) works well for grout, or you can use a general bathroom cleaner if you prefer to skip bleach.
Focus on the tiles, grout lines, and the toilet pedestal. Don’t forget the sneaky spots around the toilet skirt and baseboard gaps where bacteria love to hide. For stubborn, dried deposits that won’t budge with regular scrubbing, try a porous-surface cleaner like OxiClean ($5-7) mixed with water. Really work those grout lines back and forth—you’ll know you’re done when the brush moves smoothly without catching on crusty spots.
Once you’ve scrubbed thoroughly, grab a clean towel and buff everything dry. This step actually matters more than most people realize. Moisture feeds bacterial growth, and any dampness you leave behind will bring those odors right back. A microfiber cloth works better than a regular towel because it absorbs more water and doesn’t leave lint behind.
Step 5: Wipe Down With a Dry Towel

Once you’ve scrubbed away all that grime and residue, drying everything down stops moisture from coming back and feeding bacteria. Grab a dry towel and thoroughly blot up every bit of moisture around the toilet base, grout lines, and the surrounding floor. Wet spots are basically an invitation for bad smells to return, so this step matters.
Use a fresh section of your towel for each area you treat to keep your hands clean as you work. That shaving cream or vinegar leaves slippery residues behind, so wiping it down prevents nasty slips and keeps the bathroom safer. Pat the floor completely dry, then finish with regular floor cleaning to catch any remaining traces.
Step 6: Mop to Remove Urine Residue and Buildup

Your bathroom floor still needs one more deep clean to catch everything you’ve loosened up. Mopping removes urine residue and shaving cream buildup that wiping alone misses.
Start with a clean mop head and fresh water so you’re not spreading bacteria around. A microfiber mop head works better than traditional cotton ones because it actually picks up more of the dried residue instead of just pushing it around. You can grab a basic microfiber mop from most hardware stores for $15 to $30.
Focus on grout lines and under the toilet base where urine tends to hide and build up over time. Wring out your mop well so you’re not creating puddles everywhere, which just makes the problem worse. Let the floor air-dry completely to prevent musty smells from returning. Open a window or turn on a fan to speed things up if your bathroom stays damp.
If you used shaving cream during your cleaning, mop once more after the first drying to catch any remaining residue. A thoroughly dried floor means you’ve actually handled the bathroom odor situation instead of just masking it for a few days.
Step 7: Ventilate and Dry Completely

Why does a clean bathroom still smell bad when it’s damp? Moisture traps odors in grout, caulk, and porous surfaces, which gives bacteria the perfect environment to grow. After you finish mopping, open windows and doors right away. This lets fresh air move through the space and helps moisture escape instead of settling in.
Your exhaust fan is your biggest helper here. Run it while you’re cleaning and keep it going for at least 30 to 60 minutes afterward. If your bathroom doesn’t have a fan, a small portable dehumidifier like the Eva-Dry 1100 (around $60 to $80) can pull moisture from the air and prevent that musty smell from returning.
Touch your walls, floor, and other surfaces after about an hour. When they feel completely dry, you’re done. If they still feel damp, let the fan run longer. Proper airflow stops moisture from building up, which stops odors from coming back between cleanings.
Step 8: How Long Until the Odor Is Completely Gone?

Getting your bathroom dry is half the battle, but you’re probably wondering when you’ll actually stop noticing that smell.
The timeline depends on how deep the odor goes. Vinegar or shaving cream treatments show results within minutes to a few hours for quick fixes. Most odors vanish completely in 24–72 hours with proper drying and ventilation. Hidden problem areas like grout lines, caulk, and toilet bases need repeated treatments over 2–3 days since moisture likes to hide in those spots. Stubborn cases with advanced neutralizers combined with consistent ventilation usually clear up within 1–2 weeks.
Steam cleaning accelerates the process, often showing noticeable improvement after one session. The key is not rushing the drying process. You’re basically waiting for ventilation to do its job, which takes patience but actually works. Rushing things by closing the bathroom door too soon just traps the smell back in, so resist that urge.
Step 9: What to Do if the Urine Smell Persists?

Sometimes the smell sticks around even after you’ve cleaned and given it time. That happens more often than people realize, so if you’re dealing with this, you’re not the only one.
Start by looking for urine in places you might have missed. Check the grout lines between tiles, the caulk around the toilet base, and seams where the toilet connects to the floor. Urine seeps into these spots and hides there. Use cleaners made for porous surfaces—enzyme-based cleaners like Nature’s Miracle (around $8-12 per bottle) break down the actual urine crystals instead of just covering the smell.
For stubborn cases, rent a steam cleaner from a hardware store for about $40-60 per day. The hot steam pushes into cracks that regular cleaning can’t reach. Vinegar works as a budget option too: spray it on, let it sit for 15 minutes, then scrub and rinse well. Shaving cream is another option that people don’t expect—apply it, let it dry, then scrub it away.
Improve your bathroom’s air flow while you’re at it. Turn on the exhaust fan during and after showers, or open a window. Moisture in the air wakes up bacteria and makes odors worse. Odor neutralizers like Ozium or activated charcoal absorb smell molecules rather than masking them. Place activated charcoal bags in the corner for a few days to help pull remaining odors out of the air.
Check the bathroom again after a day or two. If the smell is gone, you’ve fixed it. If it lingers, the problem might be in the subflooring or walls, which means calling a professional might be your best option.
Step 10: Prevent Urine Odor Recurrence With Regular Cleaning

Setting up a regular cleaning routine stops urine smells from settling into grout and caulk, where moisture loves to hide. Quick daily wipe-downs after bathroom use keep urine from drying on floors and fixtures. The trick is catching problem spots like corners and under the toilet rim before odors have a chance to stick around.
A solid maintenance plan combines routine cleaning with deeper sessions using a steam cleaner (models like the Bissell PowerFresh run around $150-300) and thorough scrubbing every week or two. This layered approach works better than random cleaning bursts because you’re preventing buildup instead of fighting it after the fact. Think of it like brushing your teeth regularly versus waiting until you have a cavity—the daily habits do most of the work for you.
Establish Your Cleaning Schedule
Keeping urine smell from coming back really comes down to sticking with a routine. You need a plan that fits into your actual life, not something that sounds good but you’ll never actually do.
Weekly deep clean – Once a week, tackle the whole bathroom. Pay special attention to grout and caulk since moisture hides in those spots and creates problems.
Daily quick wipes – After someone uses the bathroom, wipe down surfaces. This stops moisture from sitting around and breaking down into that stubborn smell.
Monthly enzyme treatment – Use a product like Nature’s Miracle ($8–12) on areas under fixtures where the smell tends to stick around. Enzymes actually break down the compounds causing the odor instead of just masking it.
Ventilation – Run your exhaust fan while cleaning and for about 20 minutes after. A dry bathroom won’t hold onto smell the way a damp one will.
The right schedule depends on your bathroom. If weekly isn’t working, try twice a week for a couple weeks and see if that makes a difference. Your nose will tell you when you’ve found the rhythm that actually works.
Daily Maintenance Best Practices
Once you’ve locked in your cleaning schedule, staying on top of daily maintenance keeps odors from coming back. You’re protecting your bathroom and making it a more pleasant place for everyone using it.
| Task | Frequency | Time Needed | Why It Works |
|---|---|---|---|
| Wipe floor & toilet base | Daily | 5 minutes | Prevents urine residue buildup |
| Dry moisture-prone zones | After use | 2 minutes | Reduces odor release |
| Vinegar-based spray wipe | Daily | 3 minutes | Kills bacteria naturally |
| Check for spills | Throughout day | 1 minute | Stops problems early |
The real secret is consistency over occasional deep cleaning. A quick daily wipe-down with a vinegar spray (usually $3-5 per bottle) catches problems before they stick around. The spray works because vinegar’s natural acidity kills the bacteria that causes bathroom smells, and it dries fast without leaving residue.
Train everyone in your household to flush regularly and wipe up spills right away. These small habits add up over time, keeping your bathroom fresh without requiring exhausting effort. A basic spray bottle of white vinegar or a commercial vinegar-based cleaner like Method ($4-6) handles both daily maintenance and weekly deeper cleans, so you’re not buying multiple products for different tasks.
Monitor Problem Areas Consistently
How do bathroom odors keep sneaking back even after you’ve cleaned? You’re probably missing hidden problem spots. Start monitoring these areas consistently:
- Grout lines and caulk joints where moisture hides
- Toilet bases and around pipes where urine seeps into porous materials
- Hidden crevices under sinks and behind fixtures
- Wall corners and floor edges that are easy to overlook
Check these zones weekly during your deep clean. If odors return within 24–48 hours, you’ve found a missed source and can adjust your routine accordingly. It’s like detective work—you’re hunting down where urine actually settled, not just where you smell it.
For stubborn odors in grout, try a mixture of baking soda and white vinegar. Sprinkle the baking soda first, spray vinegar over it, and let it sit for 15 minutes before scrubbing. For sealed-in smells around toilet bases, a product like Nature’s Miracle Enzymatic Cleaner (around $8–12 per bottle) breaks down urine compounds rather than just masking them. These enzyme-based cleaners work on the source instead of covering it up.
Regular inspections paired with occasional odor neutralizers keep your bathroom genuinely fresh. The key is staying consistent with your weekly checks so small problems don’t become big ones.